Getting identity management right in modern application and API development is an increasingly important and demanding challenge. A number of developments in the industry are putting pressure on existing identity solutions.
- Integrated web experiences enable users to navigate seamlessly between different applications without requiring multiple login events.
- User experience is improved by giving users a choice about which identity they use with a given application, instead of requiring yet another password in yet another isolated, proprietary database.
- Microservices architectures (and decomposed monoliths) can require developers to reimplement the same authentication and authorization logic over and over.
- Applications deployed at scale (in a cluster) need to offload as many non-core operations as possible, for example encryption and authentication.
- Supporting the numerous existing identity standards involves undifferentiated heavy lifting that impinges on time spent on the application itself.
At NGINX we are building out our roadmap to help address as many of these challenges as possible. When you’re using NGINX Plus as a reverse proxy or load balancer for your application or API, it is ideally placed to simplify the process of identity verification in your business logic and assume the burden of authenticating requests.
Along with the release of NGINX Plus R8, we are pleased to announce the OAuth Technology Preview (OTP), an authentication handler that enables applications to consume an Internet identity without requiring any knowledge of the OAuth protocol.
The OTP is a demonstration of what can be achieved with NGINX Plus as part of the identity solution for an application. It is a collection of components that showcase how NGINX Plus can handle OAuth processing in a real-world example and provide easily consumed user identity information to an application.
How the OTP Works
The OTP takes advantage of the ngx_http_auth_request_module module, which forwards authentication requests to an external service. In the OTP, that service is a daemon we call oauth‑daemon. It’s written in Python and converts OAuth access tokens into HTTP headers which are then proxied to the demo application.
To make the demo complete, the OTP includes a demo application that does nothing more than say hello and return the name and email address obtained from the OAuth flow.
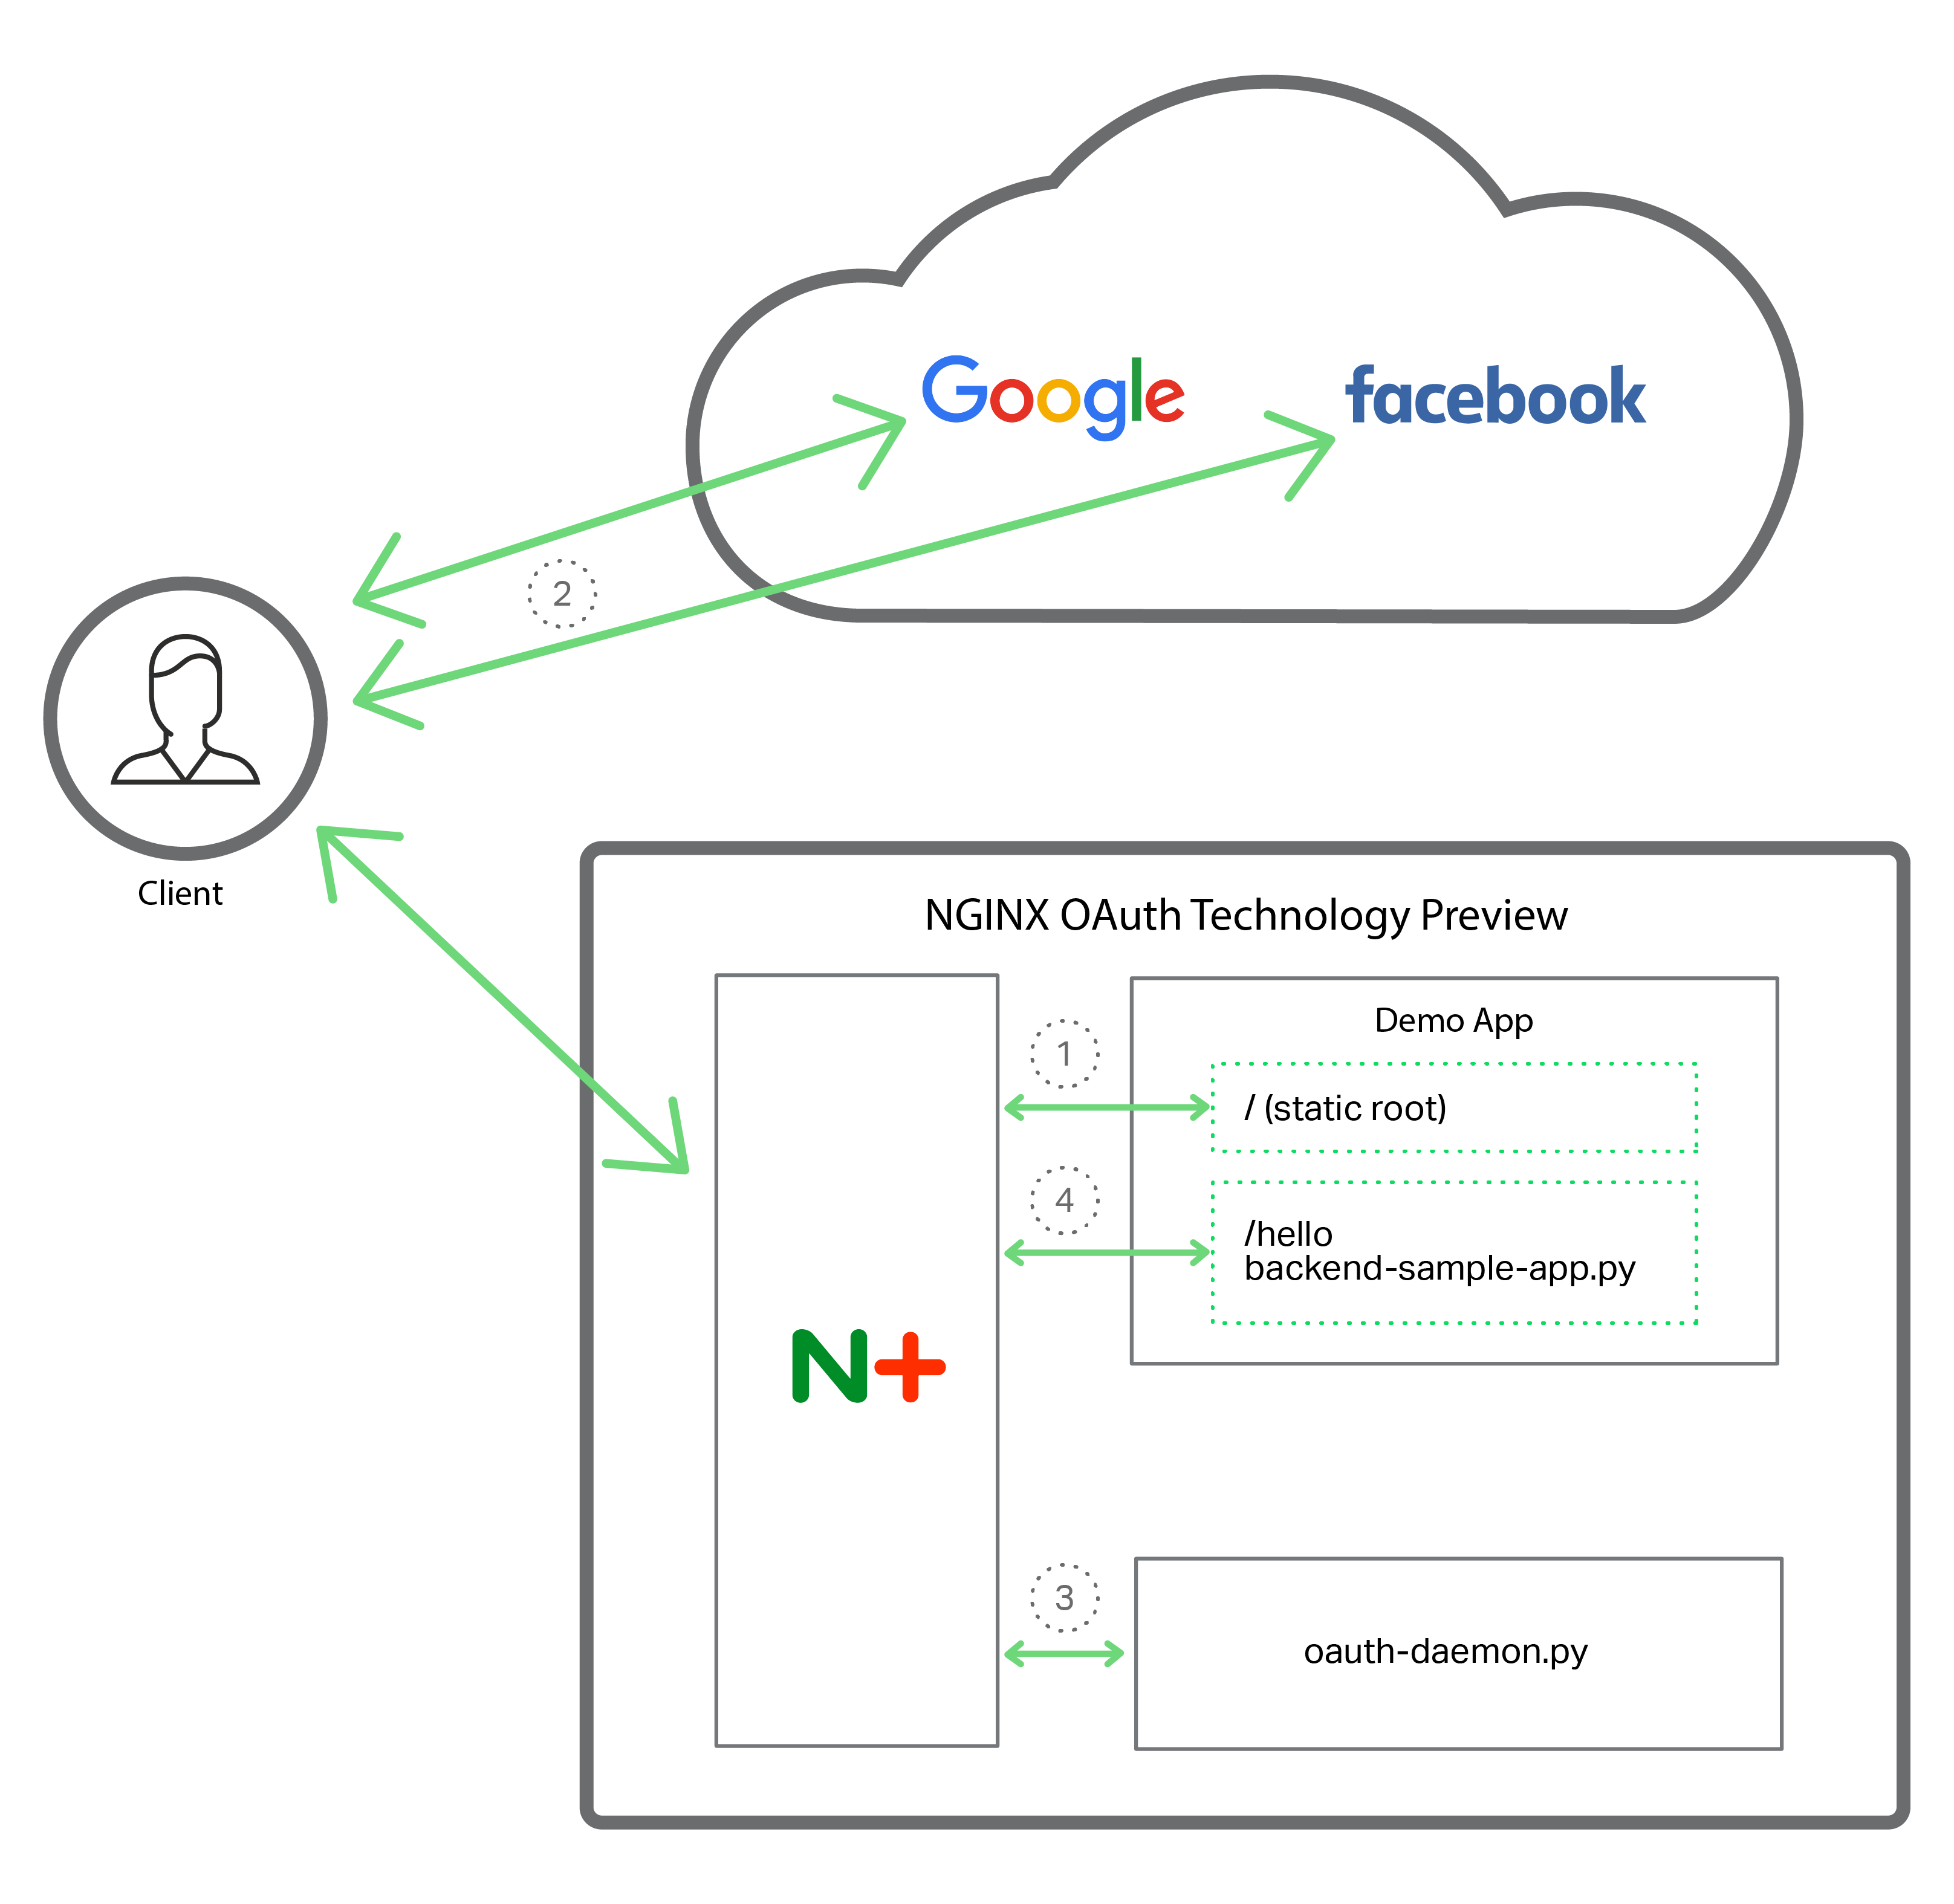
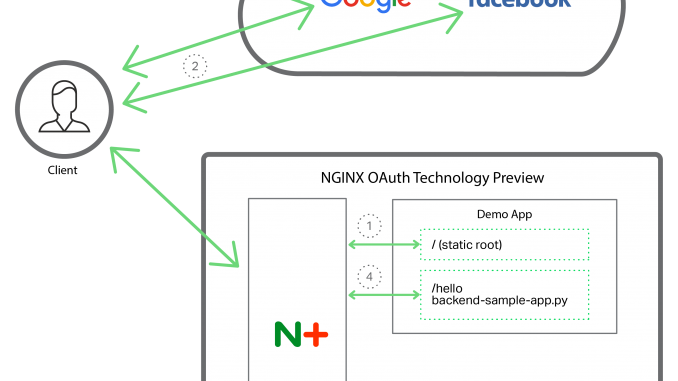
The figure illustrates how the OTP works to authenticate a client for access to a protected resource:
- Client makes a request to the root of the demo app, which presents buttons for logging in with authentication servers (also referred to as identity providers). In the demo application, the authentication server choices are Facebook and Google.
- User clicks the login button in the demo app for either Facebook or Google. When authentication succeeds, the chosen authentication server returns an OAuth access token.
- Client requests the protected resource /hello. NGINX intercepts this request and passes it to the OAuth daemon (oauth‑daemon.py), which extracts the user information from the OAuth access token.
- NGINX proxies the original request for the protected resource to the demo app (backend‑sample‑app.py), adding user information from the OAuth access token to the HTTP headers. The demo app reads the headers and displays the appropriate content to the user.
How to Obtain and Install the OTP
The OTP is available to all NGINX Plus customers. Use your existing subscription to get the nginx‑oauth‑preview package from the NGINX Plus repository, as detailed in the following instructions. <!– On a system with NGINX Plus already installed it’s as simple as running this command:
[terminal]$ package-manager install nginx-oauth-preview[/terminal] –>
Prerequisites
The OTP is intended to be installed onto a clean system but also works just fine on an existing system. You must meet the following prerequisites:
- You have a valid NGINX Plus subscription and access to the NGINX Plus repository.
- Operating system is Ubuntu 12+ or CentOS/RHEL 6+.
- System is able to make outbound web requests to get packages, updates, etc.
- System has a fully qualified domain name, reachable on the public Internet, or at least from your own computer (an entry in your computer’s ‘hosts’ file is sufficient).
Step 1 – Get the OTP Package
- Install the NGINX Plus R8 package for your operating system using the instructions at the NGINX Plus repository.
-
Using the same package manager, install the nginx‑oauth‑preview package.
On Ubuntu:
$ apt-get install nginx-oauth-previewOh CentOS/RHEL:
$ yum install nginx-oauth-preview
The OTP is installed in /usr/share/nginx‑oauth‑preview.
Step 2 – Obtain Application Credentials from Facebook and Google
The OTP supports the OAuth 2.0 implementation of both Facebook and Google. The UI in the demo application includes a login button for both of them, but you can choose to make only one of the buttons functional if you wish.
You must obtain application credentials (an application ID and secret) for the demo application from each authentication server you want to enable clients to use. Follow the instructions in one or both of Obtaining Application Credentials from Facebook and Obtaining Application Credentials from Google (because the instructions each include multiple steps, we’ve put them at the end of this post).
Step 3 – Configure the OTP
After completing Step 2, you will have an application ID and secret from Facebook, Google, or both. Configure the OTP by editing files in the OTP installation directory (/usr/share/nginx‑oauth‑preview) as indicated:
- Edit secrets.conf to add the application credentials.
-
Edit public_html/index.html to add the application IDs in these two
metatags at the top of file.<meta name="facebook-app-id" content="Facebook-application-ID">
<meta name="google-signin-client_id" content="Google-application-ID">
Step 4 – Start NGINX Plus and the OTP Software
We recommend that you run the start-up command for each component in a separate terminal window, to make it easier to track what’s going on.
-
Start the demo app:
$ cd /usr/share/nginx-oauth-preview

$ python app/backend-sample-app.py -
Start the OAuth daemon:
$ cd /usr/share/nginx-oauth-preview

$ python app/oauth-daemon.py -
Start NGINX Plus:
$ cd /usr/share/nginx-oauth-preview

$ sudo nginx -p `pwd` -c nginx-oauth.conf
Step 5 – Test the Demo Application
-
Point your browser at port 6750 at the base URL you configured in Step 2 (if you chose a different port number when you obtained application credentials from Facebook and Google, substitute it here). In these instructions, the full URL is http://demo.mydomain.com:6750/.
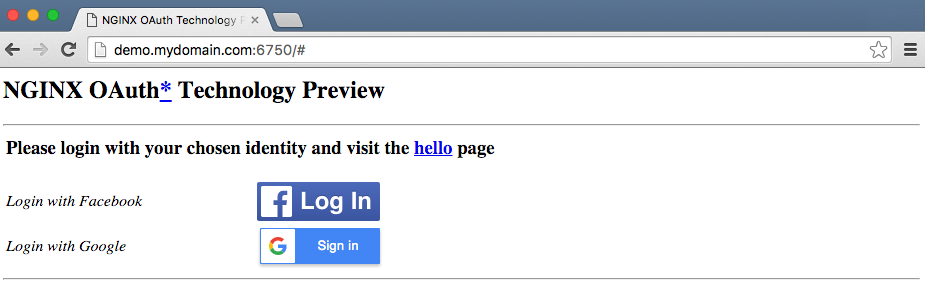
If you do not see the login buttons for Facebook and Google as in the figure, there is something wrong with the OTP configuration. Review the instructions in Step 3.
- Click the button for either Facebook or Google, granting your consent for your identity to be used to log in to the demo app. Note that while you can authenticate with both Facebook and Google, the demo app uses only one ID at a time (the most recent). You might also try clicking the link to the hello page before logging in.
What’s Next for the NGINX Plus Implementation of OAuth
As we mentioned at the top of this post, the OTP is a demonstration of the type of capabilities that we plan to add to NGINX Plus. We would love to hear about your identity challenges so that we can build the right product. We’d also love to hear from you if the OTP doesn’t quite do what you were hoping.
Have Questions or Need Help?
If you have any problems setting up the OTP, please contact the NGINX Plus support team.
Obtaining Application Credentials from Facebook (for Step 2)
- Access https://developers.facebook.com/apps/.
- Enable your account as a Facebook developer if you have not already done so.
-
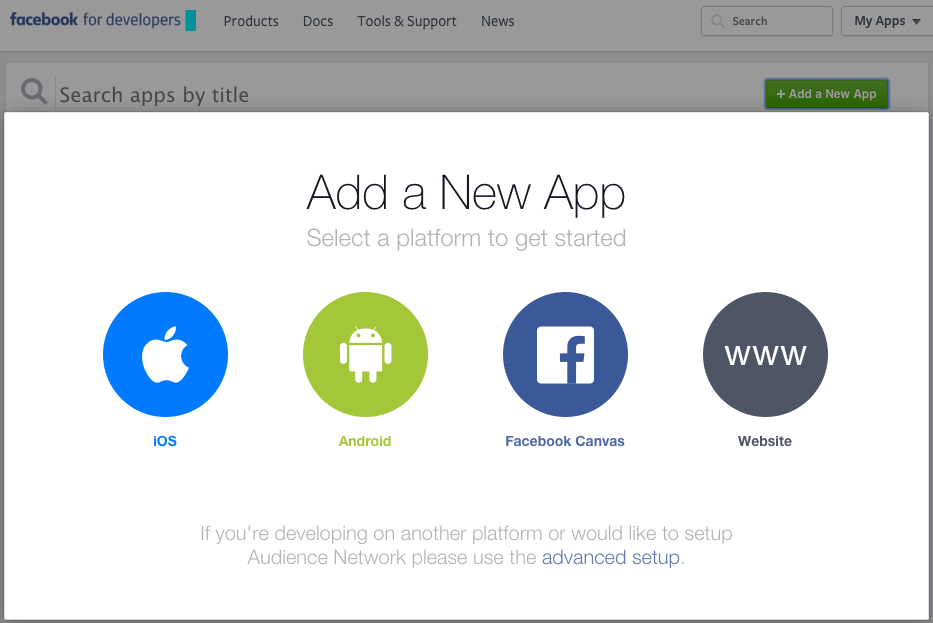
Click the + Add a New App button, then Website in the box that pops up.
-
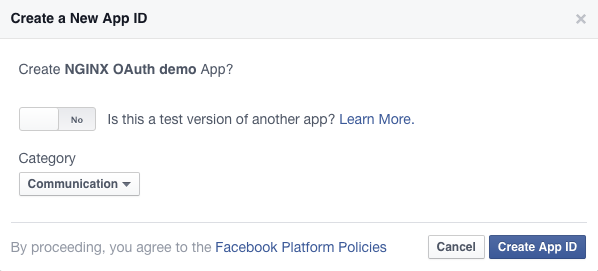
Type in the website name (here we use NGINX OAuth demo), and click the Create New Facebook App ID button.

-
Click the Category drop-down, select any value (here we’ve chosen Communication), and click the Create App ID button.
-
Type in the site URL (the base URL of your system) and port for the demo app. Here we use http://demo.mydomain.com:6750.
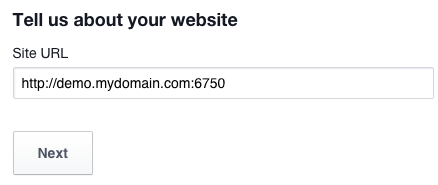
Port 6750 is used in the default NGINX configuration file provided with the OTP. There is no need to change it unless there’s a conflict or your firewall is blocking that port.
-
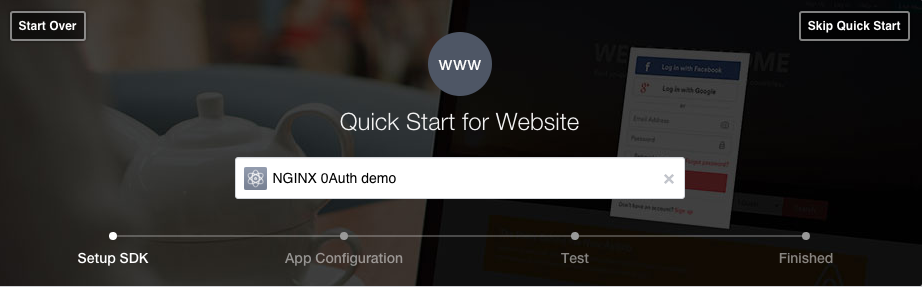
Click the Skip Quick Start button at the top of the window to go to the app dashboard.
-
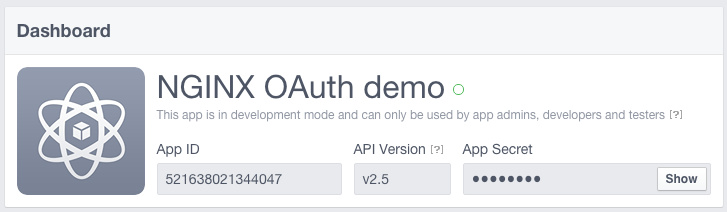
Make a note of the App ID and App Secret. You need to add them to OTP configuration files in Step 3 – Configure the OTP.
Obtaining Application Credentials from Google (for Step 2)
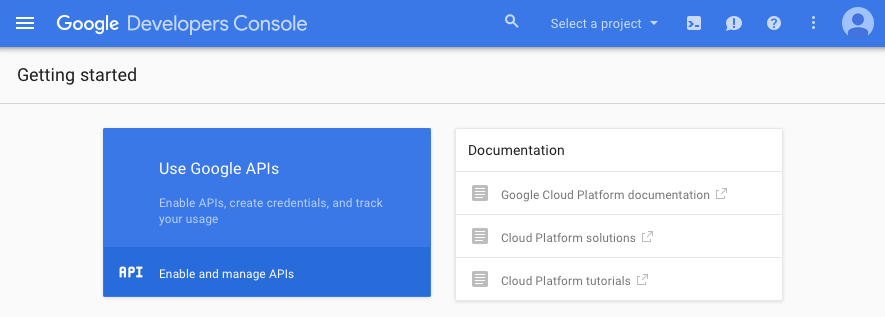
- Access https://console.developers.google.com/start/.
-
Click the Use Google APIs box.
-
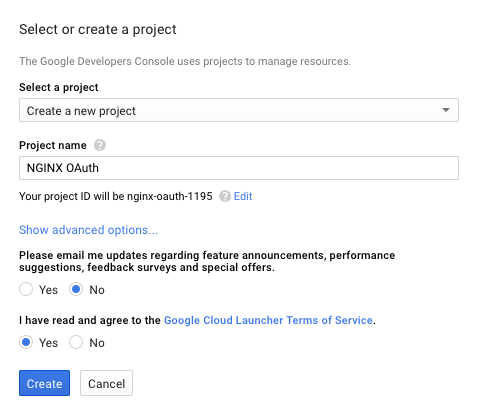
In the Select or create a project window that pops up, click on the drop-down labeled Select a project, then select Create a new project.
Type in your project name (here we call it NGINX OAuth), select the appropriate radio buttons as shown, and click the Create button.
-
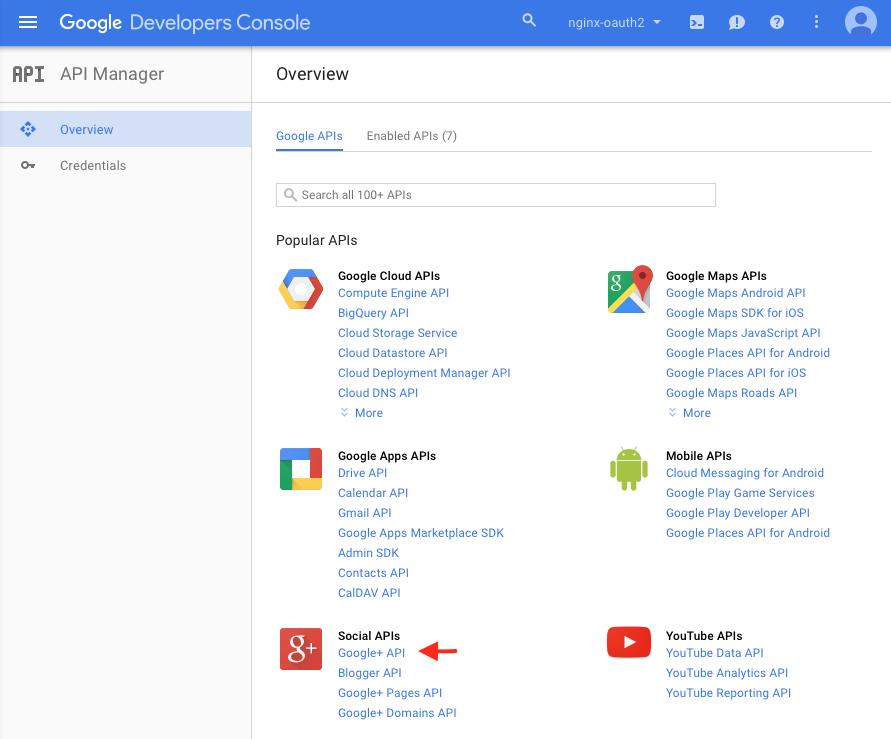
On the Overview page that appears, click Google+ API (in the Social APIs section).
-
On the page that appears, click the Enable API button.

-
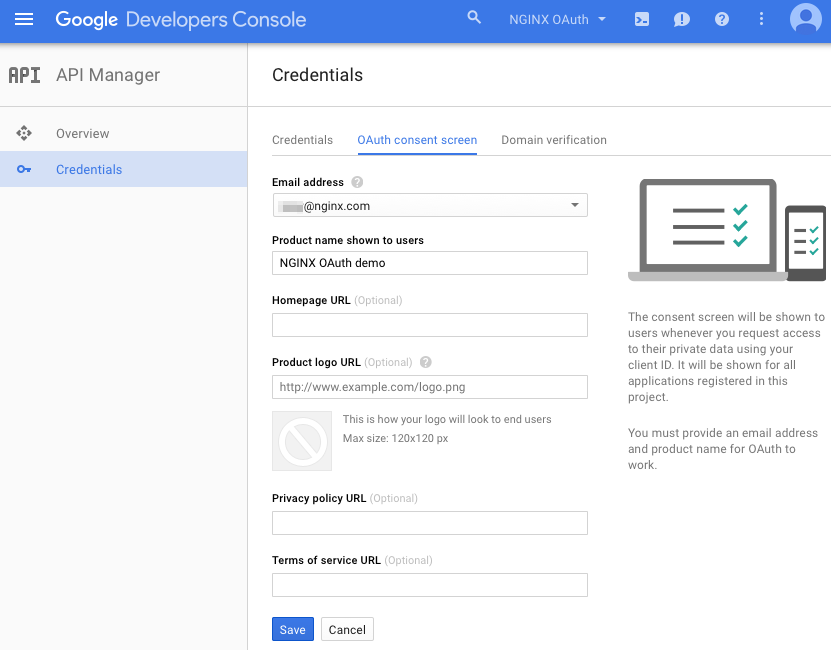
In the left navigation bar, click Credentials, then click OAuth consent screen in the main frame. Type in the product name shown to users (here we use NGINX OAuth demo), and click the Save button.
-
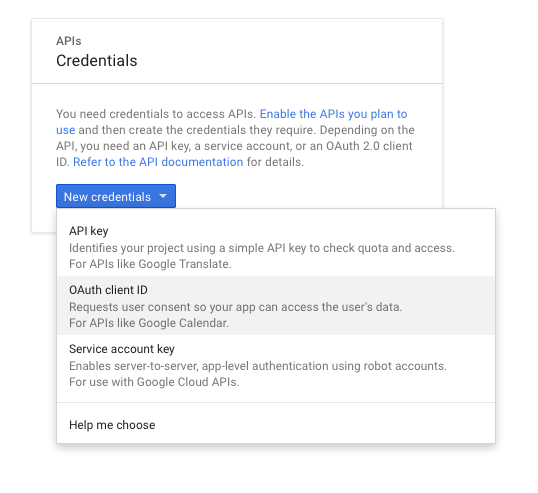
In the Credentials pop-up box, click the New credentials drop-down and select OAuth client ID.
-
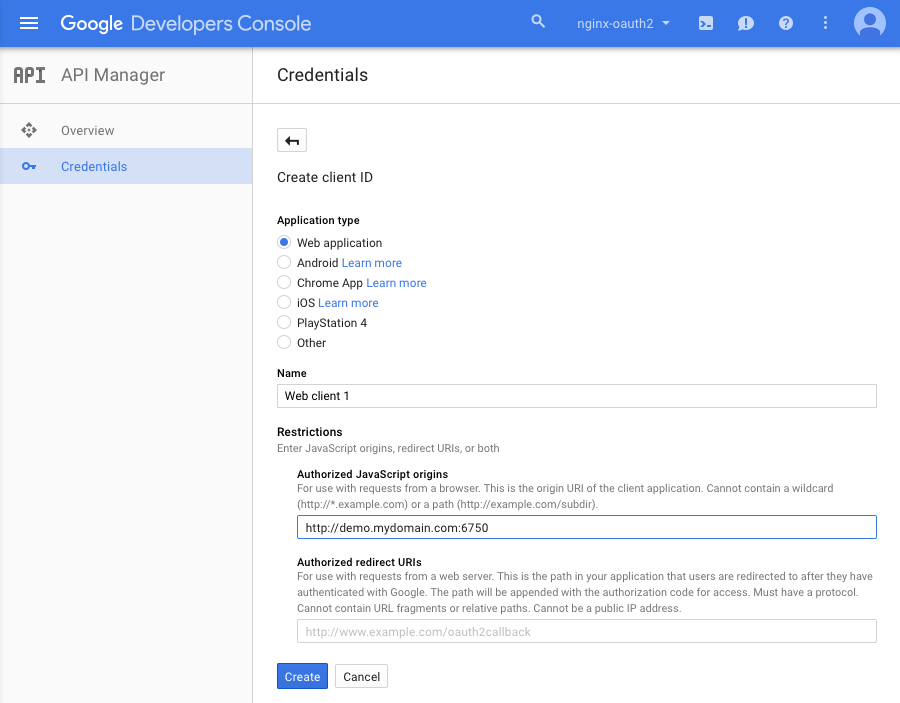
On the Create client ID page, select the Web application radio button, then in the Authorized JavaScript origins field type the base URL of your system and the port for the demo app (here we use http://demo.mydomain.com:6750). Click the Create button.
Port 6750 is used in the default NGINX configuration file provided with the OTP. There is no need to change it unless there’s a conflict or your firewall is blocking that port.
-
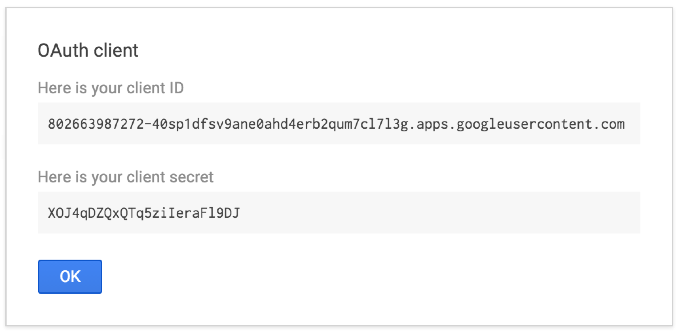
Make a note of the client ID and client secret. You need to add them to OTP configuration files in Step 3 – Configure the OTP.
The post Introducing the OAuth Technology Preview in NGINX Plus R8 appeared first on NGINX.
Source: nginx


Leave a Reply